雖然之前已經發文說明過相關內容,但因為還是陸續有詢問,所以這次用更簡單的方式列出語法,方便大家取用與學習。
以「White ColorS」噗版為例:
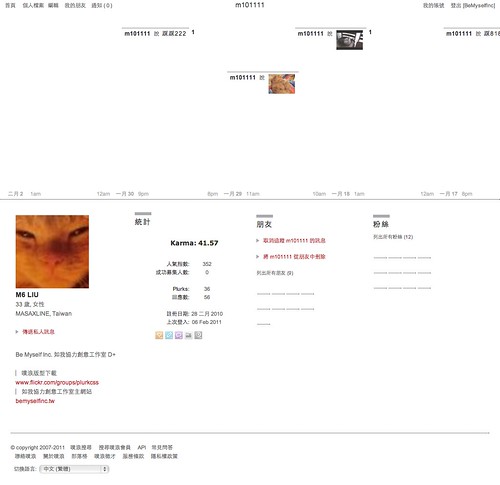
原本的噗版:
安裝網址: www.plurk.com/installDesign/5807705-2f204e3954
1. 換背景 (背景桌布圖源:san-x)

方式:
將想要使用的背景圖,上傳到像是 imgur.com 等圖片分享網站,然後將直接連結(Direct link)的網址貼入uri( )括弧中:
body, html
{
background:url(這邊放圖片網址) left top no-repeat;
}
然後再把時間軸的背景拿掉:
#timeline_holder
{
background:none !important;
border:0 !important;
}
按「儲存並更新」就可以了。
2. 換顏色

將語法中想要替換的顏色代碼(如:#666 灰色)找出來,然後用想取代的顏色代碼(例:#936158 棕色)一一置換就可以了。
更便利的方式,就是將自訂語法欄位中所有內容複製貼上至文件檔案,然後用「尋找-取代」的功能一次替換。
色碼查詢網站:http://www.colorschemer.com/online.html
3. 隱藏物件
(1) 隱藏時間軸:將橫條的時間軸與日期時間隱沒~
/*隱藏時間軸線顯示*/
#timeline_bg .day_bg .div_inner, /*底*/
#bottom_line
{
background:none !important;
border:0 !important;
}
.bottom_start, .bottom_end /*時*/
{
font-size:0px;
height:0;
width:0;
overflow:hidden;
filter:alpha(opacity=0); opacity:0; zoom:1;
}
若要留下日期,只隱藏時間,加上下段語法:
.day_start .bottom_start, .day_start .div_start /*日*/
{
color:#333 !important;
font-size:12px !important;
width:auto;
height:auto;
filter:alpha(opacity=100) !important; opacity:1 !important; zoom:1;
}
(2) 隱藏主控台:將所有資訊隱藏起來,包括加入好友粉絲與發私噗按鈕
/*完全隱藏主控台全區*/
div#plurk-dashboard
{
filter:alpha(opacity=0) !important; -moz-opacity:0 !important; opacity:0 !important;
height:0 !important; width:0 !important;
padding:0 !important; margin:0 !important;
font-size:0px !important; text-indent:-9999px;
overflow:hidden; zoom:1;
}
隱藏頁尾與自介、統計、朋友、粉絲各區,滑鼠移過去後再分別顯現:
div.dash-segment, /*各區*/
#footer /*頁尾*/
{filter:alpha(opacity=0) !important; opacity:0 !important; zoom:1;}
div.dash-segment:hover,
#footer:hover
{filter:alpha(opacity=100) !important; opacity:1 !important; zoom:1;}
(3) 隱藏往前往後的圖示:設透明度0隱藏起來,滑鼠移過去再出現
/*隱藏往前往後圖示*/
.cmp_arrow_right, /*往右*/
.cmp_back_to_today /*移至最前*/
{
filter: alpha(opacity=0); opacity: 0; zoom:1;
}
/*滑鼠移至效果*/
div.cmp_arrow_right:hover,
div.cmp_back_to_today:hover
{
filter: alpha(opacity=100); opacity:1; zoom:1;
}
(4) 隱藏發噗區:將發噗區先隱藏起來,要輸入的時候再出現
/*發噗區透明度變化*/
div#plurk_form
{filter:alpha(opacity=0) !important; opacity:0 !important; zoom:1;}
div#plurk_form:hover
{filter:alpha(opacity=100) !important; opacity:1 !important; zoom:1;}
/*plurk-搜尋標籤透明度變化*/
#toggle_tab li
{filter:alpha(opacity=0) !important;opacity:0 !important; zoom:1;}
#toggle_tab li:hover
{filter:alpha(opacity=100) !important;opacity:1 !important; zoom:1;}
(5) 隱藏所有訊息標籤列:所有訊息、我發表的訊息、私人訊息、回應過的訊息跟喜歡的訊息標籤
/*所有訊息標籤透明度變化*/
#filter_tab
{filter:alpha(opacity=0) !important;opacity:0 !important; zoom:1;}
#filter_tab:hover
{filter:alpha(opacity=100) !important;opacity:1 !important; zoom:1;}
以上語法可以一一嘗試看看,調整你需要的效果,搭配使用。


 留言列表
留言列表